

Washing and drying is the foundation of any detail, whether it's simply maintaining your vehicle with a wash and dry or the start of a long detailing process. It's often overlooked that properly washing and drying your vehicle is the single most important step in any detailing process. This is due to the fact that most imperfections (swirls, scratches, water spots, etc.) are added to your paint during the washing and drying phase. With the proper tools, products and technique, you can easily minimize adding imperfections to your paint. There are various methods you can use to properly wash, which will be explained below in detail.
We recommend washing once every week or two.
There's a few things you want to do to get setup prior to any wash using a hose as your source of water. Properly preparing everything before you start your wash process will help things go smoother, which can help cut down on the time it takes to wash your vehicle. Being able to properly wash quickly will cut down on the chances of water spots forming on your vehicle, which can require a lot of time and effort to remove. To further eliminate any possibility of adding water spots to your paint, you can invest in a water purifier system, which removes any minerals from your water making it nearly impossible for water spots to form.
When heavy contamination has built up over time, you may want to utilize a stronger cleaner than just your shampoo, such as a degreaser, to help break up and loosen dirt, tar, sap, bird droppings, and other stubborn forms of contamination. It's usually best to degrease prior to shampooing your vehicle, so that as you shampoo your vehicle, it ensures there is no degreaser remaining on your vehicle. It's important to note that most degreasers will usually remove protective layers of sealant or wax, so use as needed. It's important that you know you'll need to re-apply your coat(s) of protection.
Note: Always read the directions of your product first and follow their recommendations when outlined. Also, check to make sure the product you are using is safe to use on the surface you plan on degreasing.
Using the two bucket wash method is one of the safest ways to maintain your vehicle while minimizing the possibility of adding imperfections to the paint. It's very beneficial to master this technique as it can be used in conjunction with various other washing methods, such as washing with a foam gun and using a rinseless shampoo.
Using a Gilmour Foamaster II Foam Gun in conjunction with your two bucket wash method can further minimize adding imperfections to your paint, as well as add some fun to your wash process. The main benefit is that you can pre-soak your vehicle with shampoo without the need to touch your paint. This allows the surfactants in the shampoo to start lifting contamination from the surface of your vehicle, which can also speed up the wash process.
Note: There is no one right dilution ratio for a foam gun and any shampoo combination. We recommend you experiment with different ratios to see what you like best. If you provide a richer concentration expect more suds and a slicker surface while washing, but if you want a great value try diluting it more.
The sheeting method is a simple process that allows you to dry most of your vehicle without ever needing to touch the paint with a drying towel. The main idea behind the sheeting method is to create a cascading effect where the water flowing onto the car combines with the water already on the surface, pulling it down off of the vehicle. Simple physics states that like particles stick together, which is why this method is so successful. When done properly, especially on a vehicle with a sealant or wax on it, you are left with only a few drops of water on each panel, which can easily be absorbed with your drying towel.
Note: This should be performed after you vehicle has been properly washed following the recommended steps. Also, make sure your hose is dispensing free flowing water prior to starting.
One of the most common mistakes people make when detailing is improperly drying their vehicle. This is often a major cause of adding imperfections to your paint. Before putting a towel to your paint, if you have access to a blower, we recommend blowing out panel gaps, trim pieces, lug nuts, between mirrors and glass, and lights. This helps prevent the continuous drip from these common areas which can be a pain when you are performing other detailing steps. For a drying towel, we highly recommend using a microfiber waffle weave drying towel for removing any water left behind (after performing the sheeting method of course). Waffle weave towels are textured so that it can help pull remaining contamination away from the surface rather than dragging it across the paint like a chamois (such as The Absorber or Shamwow). It's also much softer than a cotton bath towel, and can hold more than 5x it's weight in water.
Note: If you are performing a maintenance wash and don't plan on doing any steps afterwards, we recommend going over your paint with a quick detailer and a plush microfiber towel to remove any tiny droplets of water and to enhance your paints finish. If you are moving on to claying or Polish, a few tiny drops remaining on your vehicle are OK, as the next steps will remove them.
The latest in wash technology allows you to wash your car without the need of a hose for rinsing afterward. You still need water of course, but simply one or two buckets full will do. This allows you to wash your car in your garage, in an apartment complex or condo, or virtually anywhere you can fill up a couple gallons of water. Watch as Optimum No Rinse or a similar product encapsulates dirt and other contamination and lifts it from the surface for safe removal. Keep your car clean and save the environment at the same time with this paint safe, eco-friendly style of washing.
Note: On heavily contaminated vehicles, we recommend pre-treating the panel you are working on with a mixture of ONR in a spray bottle, prior to washing. This will help lift the contamination prior to touching your vehicle, helping minimize adding any imperfections to the paint.
This is the perfect step to use a day or two after a wash when there is simply a layer of light dust on your paint. Waterless wash options are simple, quick and effective. These products are like quick detailers, loaded with cleaners and surfactants to help remove light contamination without marring your finish. Our two most popular products are Poorboy's Spray & Wipe and Chemical Guys Go Green! Waterless Wash. They are best used with plush microfiber towels. Please know that this does not replace traditional washes. On heavily contaminated vehicles, you will add marring and swirls to the finish, waterless washes are designed to remove a layer of light dust safely.
Note: For added lubricity, you can mist the microfiber towel prior to wiping the dusty surface.
Iron removers safely and effectively dissolve iron buildup on the paint or embedded in it. Using an iron remover reduces or eliminates the need for a clay bar. Clay bars can mar the paint and take a lot of time to use, so iron removers are very effective by comparison. Upon completion the paint should be cleaner, thus improving the results of your polishing and protecting steps.
Here are a few articles related to Washing & Drying from our Ask-a-Pro Detailer Blog:
Ask-a-Pro Blog author James Melfi goes through the proper wash process for washing your car.

After you've properly washed your vehicle, the next step in the entire detailing process is to clay your paint to remove embedded contamination that was not removed during the wash. If this was simply a maintenance wash, consider adding a coat of sealant or wax, or even use a quick detailer to enhance the gloss and depth.

Using a clay bar will remove embedded surface contamination that still remains after a maintenance wash. Sometimes the contamination removed is not always visible on the paint to the naked eye. After using a clay bar on your paint you will be left with a surface that is as smooth as glass and properly prepped. It is now ready for polish or for you to apply layers of protection. Not only can you clay your vehicles paint, but glass, wheels, lights and more. A common misconception about using a clay bar is that it has an impact on removing swirls and scratches, it does not.
We recommend using a clay bar roughly twice a year, or before details where you plan on polishing the paint. If your car is subject to industrial fallout or heavily contaminated areas, using a clay bar more often may be required.
Before using a clay bar, your car should be washed and dried to remove a majority of contamination on your vehicle. The more contaminated the paint is the more likely imperfections can be added during the clay bar process.
There are two common types of clay lube, quick detailers and a combination of water and shampoo solution. The clay bar lubricant provides a slick surface for you to glide your clay over. If you use the clay on paint without clay lube, you'll notice that the clay won't slide across your paint and you can easily add marring and leave behind pieces of clay on your paint which can be a pain to remove.
Many detailers use a quick detailer as their clay lube. We recommend using one that has some cleaning power and little or no protective properties. This helps loosen the embedded contamination from the paint and yields great results. Poorboy's Spray & Wipe is a good clay lube because it's a great cleaner and creates a slick surface to work on.
Another popular option is to use a mixture of Optimum No Rinse and water. It has cleaning agents that help lift contamination from the surface, provides a slippery surface to glide your clay over and cleans up nicely. Simply add 2 ounces of ONR to a gallon of water and you have yourself a great clay bar lubricant.
Note: Reshape your piece of clay after each section so that there is a clean fresh surface exposed. If you cannot reveal a fresh surface, break off a new piece of clay. To increase the life of your clay bar, spray the bar with a clay lube and store it in a clay bar storage container.
Decontamination pads and towels utilize a urethane rubber face to help clean the exterior paint, glass, etc. making it easier and quicker than a traditional clay bar. These pads and towels can be washed and reused, even if dropped on the floor, whereas a clay bar should be trashed after it picks up some heavy contamination or is dropped on a dirty garage floor. In some instances, an aggressive clay bar may be necessary either before or after the decontamination pad or towel is used, but most of the time these will eliminate the need for a clay bar.
Here are a few articles related to Clay Bars from our Ask-a-Pro Detailer Blog:
Ask-a-Pro Blog author James Melfi goes through his process of decontaminating and claying your paint.

After your paint has been clayed it is good practice to give the car a re-wash before proceeding to the next step, which is polishing your paint. Re-washing your vehicle can ensure that any loosened contamination is removed and that all of the clay bar lubricant is removed. The wash should go much quicker since there should be nearly no contamination on the vehicle and you should be able to sheet dry very effectively since your paint will be ultra smooth. After the re-wash, then you want to polish your paint.

Polishing is the step in the detailing process that yields the most dramatic difference in your paint's appearance. The objective of polishing is to remove imperfections in the clear coat that cause the paint to look dull. Surface imperfections can include swirls, scratches, water spots, etchings, industrial fallout, oxidation, etc. These surface imperfections cause light to fragment instead of passing directly through the clear coat yielding less gloss and depth. When these imperfections are removed, you will reveal the true potential of your vehicle's paint.
A swirl mark is a very thin and shallow scratch on the surface of your paint, that often comes from washing and drying improperly. Waxes, sealants and most glazes will not permanently remove these surface imperfections at best they will hide them temporarily. To eliminate these imperfections safely and permanently you want to polish the surface starting with a less aggressive polish and using more aggressive polishes as needed. The chemical polishing agents and/or the polishing particles will safely remove the extremely fine imperfections.
We recommend only polishing as needed, which is typically around one to two times per year during a full detail. After a thorough multiple step polishing process has been completed you can maintain the finish properly using the correct washing and drying products and techniques. Keeping the paint in good condition will ensure it needs less frequent polishing.
While you can polish by hand, it is highly recommended to use a quality buffer for maximum results. When you remove imperfections in your paint, you are working in polishing particles thoroughly and evenly. To do this by hand, you need to use a fair amount of pressure while moving the pad rather quickly. To put it in perspective, the standard in the industry for buffers is the Porter Cable 7424 XP. This buffer can generate 6,800 oscillations per minute at full speed very safely and effectively. Imagine trying to move your arm 6,800 times per minute for hours on end, all while exerting 10 - 15 lbs of pressure on the applicator pad. It's impossible to duplicate by hand and it can be tiresome to do a small fraction of this work by hand.
Another main advantage of a buffer is its ability to work with various pads that help increase the polishing power. For example a blue pad is extremely soft so it's used for extremely fine polishes, but if you use an orange pad it's more dense and can work in a medium cutting polish extremely well. Best of all these pads all use the same hook and loop backing so you simply slap them on and pull them off with ease and no tools are needed. Below we will outline some of the most popular buffers for detailers and what pads and polishes they work great with. There is no one best buffer and there is no one best combination of pad and polishes, however our recommendations come from years of experience and consistently yield excellent results.
To see a comparison of the technical specifications between buffers please check out our Buffer Comparison Chart below.
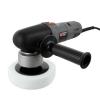
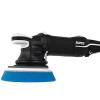
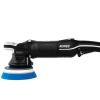
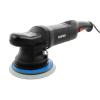
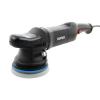
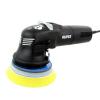
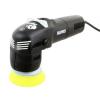
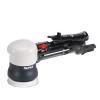
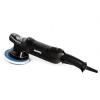
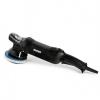
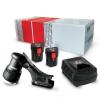
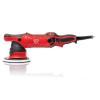
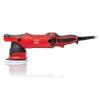
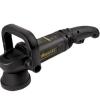
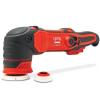
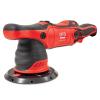
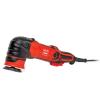
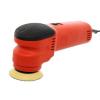
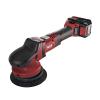
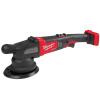
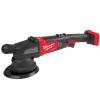
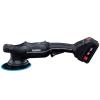
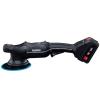

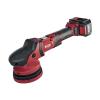
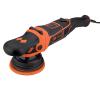
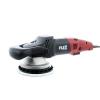
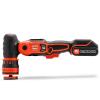

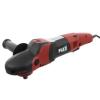
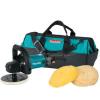
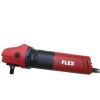
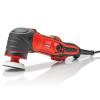
Random orbital polishers are great for both experienced professionals and first time users. Many of these buffers are very affordable, so you can get a quality tool that will last for years. It is also incredibly easy and safe to use so brand new users can expect excellent results with their first detail. Random orbital buffers oscillate rather than spin. This helps reduce the amount of heat generated on the paint and is very safe to use. Even at full speed, the risk of damaging your paint is virtually zero.
The Flex XC3401VRG dual action buffer uses a revolutionary design that really changed detailing when it was first released. Forced random orbital polishers like the XC3401VRG have the ability to correct imperfections nearly as fast a rotary buffer, but are totally safe to use and you won't burn the paint with them. The Flex is a true dual action buffer, meaning it oscillates as well as utilizes forced rotation. This creates even more power while keeping it safe and easy to use. It has plenty of polishing power to remove many surface imperfections quickly and effectively. The ergonomics of the buffer and unique features make it easy to operate, even for first time buffer users.
Rotary buffers are perfect for the high end detailing enthusiast or professional detailer. Rotary buffers can correct paint imperfections faster than random orbital or dual action buffers, however, they take lot of practice to master and have a higher risk of damaging the paint when used incorrectly.
Every buffer requires some form of a backing plate that allows you to attach pads to the buffer. Each buffer may have a different requirement for what type of backing plate is needed so make sure you get the correct one. The backing plate may come pre-assembled but many will screw in or otherwise attach to the buffer. It will stay there no matter what type of pad you use as long as it's the same size. The face of the backing plate is hook and loop (similar to Velcro) which very easily attaches to the back of the hook and loop pads. You simply just center the pad on the backing plate and press it down securely and you are done.
To determine what backing plates are compatible with your buffer, see the Compatible Backing Plates & Pads section of our Buffer Comparison Chart above. If you are not sure what size backing plate to get please see the Smaller vs Larger section below.
As previously stated a buffer is generally more effective at applying a polish or compound because it can provide more passes and pressure than a normal hand application. The added pressure and passes will work the polish in more thoroughly and effectively removing more of the surface imperfections. However, if you are not able to use a buffer you can still apply polishes by hand and make you're vehicle look noticeably better. Hand applications are generally completed with one of two methods. The traditional method is a generic hand applicator usually made of foam or microfiber. Another option is to use a product like the Polishing Pal and Lake Country four inch pads to work in the polishes.
The Polishing Pal is a huge help for those who prefer a hand application because of two main advantages over a traditional hand application. The Polishing Pal makes it is easier to distribute the pressure through the entire four inch pad instead of just where your finger tips press. Secondly you can use any of the four inch pads from Lake Country which are a huge help with the polishing process. For example you will get more polishing power with an orange four inch pad and the Polishing Pal versus the same application with a traditional foam applicator. The Polishing Pal can be used with various pads so you use it to apply any compound, polish, glaze, sealant and wax. Many detailers believe the Polishing Pal feels more comfortable to work with and less tiresome.
With so many polish options available, it can be difficult to choose which product will work best for your needs. Each polish has their pros and cons, while a few excel in almost everything. Polishes can vary from a non-abrasive chemical cleaner to a very abrasive compound. The overall objective of polishing is to rid the surface of imperfections. In an ideal world, you would always use the least aggressive polish and pad combination to get the results you are looking for. The problem with going this route is it can be very time consuming to test lots of polish and pad combinations and it can be costly to stock up on multiple polish and pad combinations. As you become more experienced, you will be able to assess your paint and have a good idea what level polish you will need.
As a detailing enthusiast, it is recommended to have at least one polish of each level on hand to tackle any type of imperfection that may come your way. Listed below are the various types of polishes and what each polish is typically used for.
Compounds are the most aggressive type of polish and should be used only as needed. Compounds are commonly used on severely neglected vehicles and to clean up wet sanding marks. Compounds will almost always leave behind some marring, hazing, or holograms and should always be followed up with a finer polish and pad combination.
Most polishes that correct moderate paint imperfections fall into the category of a cutting polish. They are less aggressive than compounds in terms of cutting power and usually do not finish down as well as a finishing polish. On most paint, it is recommended to follow up a cutting polish with a finishing polish to remove any micro-marring, hazing or holograms as well as increase the depth and gloss. Some cutting polishes are capable of finishing down very nicely on certain paint finishes, but to be safe we recommend a light pad and polish be used afterward.
The point of most finishing polishes is to remove very minor imperfections in the paint, such as micro-marring, hazing and holograms. Finishing polishes typically will not remove imperfections deeper than a very light swirl. They are also used to burnish the paint to achieve an exceptional level of gloss and depth.
All-In-One polishes are products intended to not only clean the surface, but add gloss and protection to the paint all in one step. Typically you can only remove very light imperfections in the paint, so these are great as a one step polish option, or at the end of a two or three step polishing process. These types of polishes combine detailing steps, to greatly save time and overall effort.
When it comes to selecting the proper pad for polishing, you want to always make sure you take a few things into account:
A mismatched pad size, aggressiveness combination, etc. can create unnecessary work while wasting your time and product, so take the time to ensure you have the right pad and polish for the job. Below are all of the pad types we carry with some highlights of each!
A Foam Pad is a pad that is produced with a cellular structure (can be either open or closed cell), used in paint correction or to apply protectants or cleaners to a surface. These pads come in various styles, made by different manufacturers, each designed for different polishing steps or use with different polishers. Take a look at the list below for all of our foam pad offerings.
Microfiber pads are a type of cutting and/or polishing pad made up of microfibers on the face. These fibers grab the paint less, which increases pad rotation. This higher rotation rate translates into increased defect removal making microfiber a great choice when looking to remove heavy imperfections. There are also some great light polishing options as well. Below are some of the microfiber pads we carry.
Wool pads are made from a natural or synthetic material typically used to produce a polishing pad for aggressive defect removal, especially when using a rotary machine. Take a look at the list below for some of the wool pads we carry.
Below are a few other polishing options you cannot forget, by glass and hand polishing. With glass being incredibly hard, we recommend using glass polishing discs and a glass specific polish (i.e. CarPro Ceriglass). For hand polishing, the 4" Foam Pads fit perfectly on the Polishing Pal. Polishing by hand is a lot of work, but this combo makes for great spot polishing and/or protection applications.
Different pad sizes can have an impact on how well the buffer works in a polish, control, maneuverability, and how fast you can cover an area.
Smaller pads, in general, will offer you more control with any buffer. Smaller pads also make it easier to maneuver buffers in tighter areas, around corners and closer to trim pieces. On the downside, a smaller pad will fill up with product faster than a larger pad. For maximum results, especially when polishing, it's best to swap the pads out for fresh ones more frequently, especially with the smaller pads. We recommend changing the pad out for a fresh one every couple panels, so you may use 4 - 6 pads per coat. In general, the fresher the pad, the better the results.
Larger pads can cover a larger surface area in less time. This is particularly helpful with a sealant or wax which only needs to be spread nice and thin. We recommend using 2 - 4 pads per coat so you get maximum results while polishing. The downside to this larger surface area is that it's slightly less effective when trying to thoroughly work in a polish.
With random orbital buffers, such as the Porter Cable 7424 XP, the smaller the pad, the more effective you'll be able to work in polishes. This is due to the fact that you are concentrating more of the buffers energy over a smaller area. Larger pads on a random orbital do not break down polishes as effectively as smaller pads because the energy is distributed over a larger area.
With a rotary buffer, the opposite holds true. Smaller pads offer less polishing power versus a larger pad. On a rotary buffer, the outer edge of the pad is spinning the fastest. The larger the pad is, the more cut you are going to get out of a rotary buffer. This can correct imperfections faster than smaller pads, however, the risk of leaving behind hazing or holograms is much higher with larger pads on a rotary buffer.
There is no one right size pad, it just depends on your specific goals and the buffer you choose. In general, if we have to pick one size we recommend the 5.5" pads as they are a nice happy medium. The 5.5" pads provide enough corrective power while covering plenty of surface area to complete the detail in a timely manner.
As you progress through your polishing process, your pads will become saturated with polishing product and clearcoat removed from the surface. Because of this, you want to make sure you are using 4-6 pads per polishing step and to clean your pads during use. Swapping out pads and cleaning often will not only help increase your polishing results, but it will prolong the life of your pads. After you are done polishing, clean your pads thoroughly and let them air dry completely. Once dry, store in an open bag and in a closet, drawer, etc. Keep the bag open (i.e. DI Accessories Recloseable Storage Bag) so that you do not lock in any moisture during storage.
Foam Pads - We have three options that we like, two for cleaning during the polishing process and one after. If you are looking to clean during polishing we recommend using either a foam pad cleaning brush or pad washer. If you clean with a foam pad cleaning brush, we recommend flipping the pad over and brushing the face of the pad with the brush. This helps remove any polish and clearcoat on the face of the pad without using any water. It does not, however, remove any soaked up product, so we still recommend swapping out your pads as much as possible when using this cleaning method.
If you are using a pad washer, once you are all set up (water and pad washer), submerge the pad in water and against the grate and turn your unit on. This will spin the pad across the grate and remove polish and clear coat leaving it in the water. Back the pad out of the water and off the grate and continue to spin until dry.
One of our favorite cleaning processes, however, is to clean at the end. Leave a bucket with water and pad cleaning solution to the side and toss pads in after every panel. This lets them soak, not allowing any polish to dry in the pad. After you are done polishing, take your bucket of pads and rinse them under running water, using a cleaner to help remove any excess polish.
Microfiber Pads - These pads have a tendency to mat down during polishing, so it is very important to clean often while in use, along with one final cleaning at the end. To clean, simply use compressed air to blow the pads clean, keep them dry and lower temperature all at once. If you do not have access to compressed air, a pad cleaning brush will do the trick as well.
Wool Pads - Just like microfiber pads, wool pads can mat down during use. To clean we recommend a combination of compressed air, along with a pad cleaning spur. Both work great to keep the pads clean, cool and lasting longer during the polishing process. After you are done polishing, use the spur or compressed air again, or a pad washer for one final cleaning before storage.
Properly polishing your paint to remove imperfections can take lots of practice to master, but if you follow these steps as closely as possible, you'll get the best results in the shortest amount of time. Before you polish your vehicle, the paint should already be washed and clayed for maximum results.
In order to know if you are getting the results you are looking for when polishing, it is extremely important to invest in quality lighting. One of the most cost effective light sources you can purchase is a Scangrip light. Using the proper lighting will reveal imperfections in your paint and give you a clear understanding if the polishing combination you selected is going to give you the results you'll be looking for.
To help reduce the risk of damaging any part of your vehicle, it is best to tape off the areas you want to protect. By properly taping, it also allows you to get as close to trim pieces as possible without damaging them. There are many quality options on the market but we recommend the 3M Automotive Performance Masking Tape. This will release easily from your paint with little to no residue left behind and is easy to clean up. We recommend taping off any area you do not want to polish or get any product on. Common areas to tape are your trim pieces, around emblems, headlights, tail lights, around clear bras, and more. When in doubt, tape it up, it's better to prevent a problem than to create one.
Note: After every couple of panels, replace your pad with a fresh one for maximum results. If you are working with a limited number of pads, clean out the pad after every few sections using a medium bristled toothbrush and the buffer on a low speed (do this away from the car as it can potentially dust quite a bit).
Note: After every couple of panels, replace your pad with a fresh one for maximum results. If you are working with a limited number of pads, clean out the pad after every few sections using a medium bristled toothbrush and the buffer on a low speed (do this away from the car as it can potentially dust quite a bit).
Note: After every couple of panels, replace your pad with a fresh one for maximum results. If you are working with a limited number of pads, clean out the pad after every few sections using a medium bristled toothbrush and the buffer on a low speed (do this away from the car as it can potentially dust quite a bit).
Upon completion the paint should have less swirls, oxidation and other surface imperfections. With a more optically clear surface you will now get a deeper gloss and a better shine. Additionally your sealant or wax used afterward will bond to this cleaner and smoother surface better so you can expect increased durability from the protection.
Here are a few articles related to Polishing from our Ask-a-Pro Detailer Blog:
Ask-a-Pro Blog author James Melfi explains where paint swirls and scratches come from in the first video below. In the second video, James shows you how to properly polish your car paint.


After polishing your paint to your liking, the clear coat is more optically clear and you'll get a much deeper reflection. It should look more vibrant and feel smoother to the touch. After that, your next step could be to use a glaze, sealant or wax. These products will help enhance the appearance of the surface and the sealant and wax can protect it.

A glaze is often an optional step of the detailing process, but when used correctly can help add an additional layer of gloss and depth to the paint. Glazes are essentially polishes that leave behind oils, kaolin clay or some other substance that is designed to increase the depth and gloss while being able to mask or hide some minor imperfections in the paint. Glazes are great products to use right before a car show as it can help increase the depth and gloss, especially on lighter colored vehicles where this is often hard to accomplish. One of the downsides of using a glaze is that it may reduce a sealant or waxes ability to bond to the paint with it's maximum potential. The sealant and wax will still protect very well, it just may not last quite as long as it would if it was used on the bare paint.
Many people's expectations are often too high when it comes to a glaze filling in minor imperfections. If your car is filled with swirls and scratches, you are much better off investing in a polish to remove the marks, which is also a permanent fix, the results from a glaze are temporary. Your car should be washed, clayed, and polished prior to using a glaze for optimal results.
It's never absolutely necessary to apply a glaze so it can be done as little as you would like or as much as you would like. For best results we recommend applying a glaze during a full detail, therefore it would be after washing, clay and polishing and before your sealant and/or wax. At a minimum make sure the vehicle has been freshly washed, apply the glaze and lastly apply the sealant and/or wax of your choice.
When using a buffer to apply a glaze, we recommend using a black finishing pad.
Here are a few articles related to Glazes from our Ask-a-Pro Detailer Blog:
After applying the glaze to your paint, the next step is to protect the exterior paint. This can be done with a sealant or wax or a combination of both. If you want to apply both apply the sealant first and layer the wax on after.

The primary purpose of a sealant is to properly protect your vehicle from the elements. Sealants are designed to bond to your paint and provide roughly 3 to 6 months of protection. This is significantly longer protection than what a carnauba wax offers, which is typically 3 to 8 weeks. The barrier of protection that sealants provide help minimize contamination from embedding in to your paint and makes maintaining your vehicle significantly easier. Another benefit of a sealant is that it will enhance the look of your paint by giving you sharper reflections and more depth and gloss.
Applying multiple coats will increase the strength of the protection and durability of the protection. The most important thing to note is that when you want to apply more than one coat, you have to let the previous coat cure. Each sealant's cure time will vary and environmental conditions (i.e. temperature, humidity, etc.) can impact cure times. Most sealants will cure within 1 - 24 hours and the vast majority of any sealant will be cured within the first hour. If you have the time waiting 24 hours is ideal to be absolutely certain but if you are in a rush waiting a minimum of one hour should still work very well for most sealants.
In general, sealants typically last between 3 to 6 months. There are many factors that go into determining how long a sealant will last. Some of the major factors are if your car is stored in a garage or outside, how many miles are driven, the type of weather conditions your vehicle is exposed to, how well your paint was prepped prior to applying the sealant, the frequency of washing your vehicle, and type of shampoo. The key is to reapply your coat of protection before the previous coat runs out. As you maintain your vehicle, keep an eye out for how well the water beads and sheets off your paint. If water begins to pool on your paint, then chances are there is little to no protection remaining and it's advised to apply another coat of sealant. A good rule of thumb is to reapply a coat of sealant once a season (4 times a year).
The key when applying a sealant is to stretch the product as thin and far as possible. The saying "less is more" definitely applies to any quality sealant. We do not recommend applying a sealant with a rotary buffer, but it is fine to use a random orbital or dual action buffer using a soft foam polishing pad. Hand applications also work very well and help you get in to tight spaces more effectively.
Here are a few articles related to Sealants from our Ask-a-Pro Detailer Blog:
After applying a sealant, it's best to let the coat cure for at least one hour before applying a second coat or a wax. You may opt to top your sealant with a carnauba wax to help increase the depth and gloss in the paint. Natural carnauba waxes also tend to bead water better than sealants, so maintaining your vehicle is slightly easier when it is protected by a carnauba wax.

While the idea of "wipe on, wipe off" still applies, the application process of coatings differs quite a bit from both sealants and waxes. Rather than applying to the entire car, waiting some period of time to cure, then removing the residue, a coating application is done panel by panel and sometimes even sections of a single panel due to its quick drying time.
A coating starts as a liquid that is poured onto an applicator and applied to a section of the paint. Coatings react with air quickly and start drying and becoming harder, turning into the resistant layer described above. Before the coating is fully hardened, it needs to be leveled. This is accomplished by wiping off remaining residue from the coated section after a certain amount of time has passed, using a quality microfiber towel.
This amount of time depends on the coating that you're using, but generally speaking it's anywhere from 1 - 3 minutes on the low end, 5 - 10 minutes for some "medium" drying coatings and then 15 - 20+ minutes for slower coatings. It's always a good idea to have a timer handy when working with a coating because you do not want a coating to dry too much before leveling. This will lead to a hazy finish which will at the very least require quite a bit of elbow grease to fix and at worst may require polishing the coated section to fully remove the badly applied coating layer.
In short, the application of a coating includes:
Similar to the dry times mentioned above, cure times will vary from coating to coating. By "dry time" I'm referring to the coating going from liquid to a more solid state during application, at which point it needs to be leveled with a towel for a proper bond and good looks. "Cure time" refers to the amount of time a coating needs to fully harden and be resistant to the environment and this time starts after the coating is leveled. Most coating manufacturers require a cure time of 24 hours before the coating can be exposed to water that can potentially dry on the surface. Most also require no washing with any detergents for 4 - 7 days after application. Generally, coatings will fully cure anywhere from 1 - 4 weeks. This cure time can be accelerated by using certain lamps to speed up the curing process.
Layering is possible with most coatings, but again, very different than when using waxes or sealants. In the case of coatings, you will usually need to apply a second layer within 30 - 60 minutes of the first layer in order to get a bond with the first layer. Reason being, once the coatings start to dry and cure, they become more and more hydrophobic and resistant to anything sticking, including consecutive layers of that same coating. If you try to apply another layer on top of a coating after a few days, it will simply "reject" it and it would be a waste of time. Most coatings can work with two layers and some 3 - 5 or more, but it will vary depending on the manufacturer. Make sure you consult the label or manufacturer for specifics about layering.
As mentioned in the first paragraph, coatings generally last 1 - 3+ years. This means that a coating will be reapplied much less frequently than waxes or sealants, but that doesn't mean that you can't apply a wax or sealant on top of the coating. It's actually encouraged so as to provide even more protection and protect the coating investment. Due to a coating application requiring polishing prior, you'll want to reapply a coating at a point where it's starting to diminish due to age or when the paint starts looking a bit swirled and it's time again for polishing. This will vary depending on maintenance done to the coated vehicle.
There is nothing special when it comes to coating maintenance aside from not being able to use clay bar. Clay bars have strong cleaning power and can diminish the coating to some extent. Using chemicals such as IronX and TarX when necessary will be much better for the longevity of the coating. Otherwise, proper washing and drying techniques will keep the coating looking good and continuously protecting.
Re-application will depend on the look of the car, strength of the coating after a certain time and personal preference. As mentioned above, some level of polishing is required prior to applying a coating. This should be done either when the coating is on its last legs or if the paint condition is not to your liking anymore. If polishing to remove defects, keep in mind that some coatings can withstand a fine polishing, which means that you may be able to remove some swirl marks without fully removing the coating. At this point you need to decide whether you want to do a more involved polishing and re-apply the coating or if you simply want to stay on top of it with a wax or sealant every few months until the coating gives way and needs to be applied again.
Here are a few articles related to Coatings from our Ask-a-Pro Detailer Blog:
Ask-a-Pro Blog author James Melfi demonstrates how to apply a paint coating.


Carnauba waxes are a great way to protect your vehicle against the elements. Carnauba waxes often offer stronger protection than sealants do, but will not last as long. Waxes typically last 3 to 8 weeks, where a sealant can last up to 6 months. Carnauba waxes often bead water better than sealants, which makes your vehicle easier to maintain. Carnauba waxes are what you want to use when you want the absolute wettest finish possible.
Applying multiple coats or layers of wax can add more protection, gloss and shine to the surface. When you want to apply more than one coat, you have to let the previous coat fully cure. Assuming you apply the wax nice and thin, the cure times will range from 1 - 24 hours. The exact time will vary depending on the specific wax, how it was applied, temperature, humidity, etc.
In general, carnauba waxes will last anywhere from 3 to 8 weeks. There are many factors that go into determining how long a wax will last. Some of the major factors are if your car is stored in a garage or outside, how many miles are driven, the type of weather conditions your vehicle is exposed to, how well your paint was prepped prior to applying the wax, the frequency of washing your vehicle, and type of shampoo. The key is to re-apply your coat of protection before the previous coat runs out. As you maintain your vehicle, keep an eye out for how well the water beads and sheets off your paint. If water begins to pool and look flat on your paint, then chances are there is little to no protection remaining and it's advised to apply another coat of wax. A good rule of thumb is to re-apply a carnauba once a month (12 times a year).
Here are a few articles related to Wax from our Ask-a-Pro Detailer Blog:
Ask-a-Pro Blog author James Melfi highlights his process of properly applying a car wax.

After applying your wax, it is best to allow the coat to cure for 1 - 24 hours before topping it with another coat of wax. If you are done applying the wax congratulations on completing your detail work! Mark on your calendar when you completed this detail and create a maintenance schedule for yourself. You can now move on to the interior, exterior trim, wheel and tire care or the engine bay care section.

Microfiber products are absolutely essential to high quality detailing for both the interior and exterior of any vehicle. Microfiber towels, applicators, wash mitts and pads are used in virtually every area of detailing. You may use microfiber products to clean the paint, leather, wheels, glass, interior and so much more. The uses are literally endless so you can never have enough top quality microfiber products.
Microfiber is made up of a unique blend of materials with an innovative weave and fiber designs made of ultra fine synthetic yarn. The synthetic yarn is usually comprised of 70% - 80% polyester with 20% - 30% polyamide depending on the specific towel. Each strand is approximately 0.2 denier, which is equivalent to 1/20th of a strand of silk or 1/100th of a human hair. The cross section of a microfiber strand resembles an asterisk (*), which allows them to collect and trap particles whereas traditional towels push particles around or temporarily collect them. On dry surfaces the microfiber towels use electrostatic energy to easily lift and collect large amounts of dust, dirt and other particles in to the micro-wedges of each fiber.
People often will splurge on their wax but spend far less on microfiber products when they are truly the backbone of a good detail. Investing in quality towels and caring for them will greatly increase your results while saving you time and money in the long run. The life of your microfiber products will vary based on the quality of the towel and how well you care for them. Not all microfiber towels are created equal so low quality towels may feel nice at first but they often break down rapidly with just a few washes. At DetailedImage.com we take great pride in selecting only top quality towels that will last for years with good care.
Generally we recommend you maintain three groups of towels, storing them in separate containers. The first group is the pristine new towels that you use on the most sensitive surfaces such as the exterior paint, gages, navigation screens, etc. The second group are towels still in great condition but may be a bit worn, which we use for interior cleanings, glass care, leather treatments, etc. All other towels in the third group may have visible stains and be noticeably worn down. Use these towels for your dirty jobs like cleaning the exhaust tips, engine bay detailing, door jambs, etc.
When you receive your towels you should wash them just to ensure they are clean and free from any contaminants they may have come in contact with while in transit. Before washing any microfiber make sure you have removed any stickers or labels that come on some new microfiber towels. Never wash microfiber towels with any other fabrics as the microfiber towels will collect the lint, which can greatly reduce the effectiveness of any microfiber product. Microfiber is virtually free of lint so you can wash them with other microfiber products only. Do not use any detergent with fabric softener or bleach in it. Using fabric softener will deposit a coating on the microfiber strands that clogs the pores, which reduces absorbency, cleaning ability and can lead to streaking. If you are not sure what to use you can pick up the DI Microfiber Micro-Restore Microfiber Detergent Concentrate, which has no fabric softener, bleach or added scent. If you are looking for additional cleaning power you can add one teaspoon per towel of distilled white vinegar.
When you are done washing the towels you can air dry them to be extra cautious, however many detailers need the help of a dryer due to time constraints which is generally fine. Do not use any dryer sheets and make sure you have cleaned the lint filter and removed any other lint particles. Again the microfiber towels will collect lint from other fabrics so do not dry it with other fabrics. Try to use just enough heat to dry the towels and do not overheat the towels. Excessive amounts of heat can harm the long term health of the towel.
As mentioned above the towels should be separated and stored according to their condition and we generally recommend three groups. Put them in an air tight storage container like a zip lock bag (i.e. DI Accessories Reclosable Storage Bag) or a rubbermaid container that is labeled to avoid dust and dirt settling on your recently cleaned towels. Remember microfiber products have a natural electrostatic charge and will literally pull contaminants in so it's very important to store them properly.
Here are a few articles related to Microfiber from our Ask-a-Pro Detailer Blog:

Wheels can drastically change the appearance of any vehicle, which is proven by the huge after market offering. Having wheels covered in brake dust is a complete eye sore and can take away from the overall look of any vehicle. Wheels that look brand new, on the other hand, can turn heads and really show off your car. Properly caring for your wheels is not difficult or time consuming when maintained on a regular basis.
Caring for your wheels consists of properly removing contamination, polishing them to a high shine, then protecting them to make maintaining your wheels significantly easier. Stubborn brake dust can often be difficult to remove, but usually can be restored to a like new finish with the proper products and tools.
We recommend maintaining your wheels with a basic wash of soap and water with a dedicated wash mitt, every time you clean your vehicle (1 to 2 weeks). Thorough cleaning of your wheels and adding layer(s) of protection should be done every 2 to 3 months.
When caring for your wheels it is important that you have the proper products and tools. It is also important to know what type of wheels you have so you use the proper products on them. If you have factory alloy wheels, chances are they have a layer of clear coat on your wheels. This makes things easy because you can use a variety of wheel cleaners without worrying about oxidizing your wheels finish. You can also treat them like you would your clear coat on your paint, which means you can wash, clay, polish and protect your wheels. After market or upgraded wheels that have a high polished finish or bare metal need to be treated carefully, otherwise you may oxidize the finish and potentially damage your wheels.
Your wheels should be completely cool when you start to clean them. If you have been out driving, even just a little bit, give them ample time to cool down before using any cleaner on them. You can spray them down with water to help them cool down but it may take some additional time for them to reach air temperature so you can begin cleaning. Clean the wheels in the shade whenever possible to avoid water marks or rinse them frequently while in direct sunlight.
The best way to clean and maintain your wheels is by using some automotive shampoo and water with a dedicated wash mitt. This is safe for every type of wheel finish and also means you are not spending money on wheel cleaners. This is a very effective way to care for your wheels if you follow two things 1) maintaining your wheels on a regular basis 2) you have a coating of protection on your wheels.
Soap and water will help remove loose contaminants and clean wheels that are well maintained but often times stubborn build ups will require a wheel cleaner. The safest bet is to use a pH balanced (aka pH neutral) wheel cleaner, such as the SONAX Wheel Cleaner Full Effect. They can be used on any type of wheel finish and you can increase the cleaning power by letting the product dwell for several minutes if you are in the shade. Acidic wheel cleaners are highly effective but they can easily oxidize or tarnish polished wheels and other sensitive wheel finishes. Acidic wheel cleaners should only be used on factory wheels with a thick clear coat on them. When you are done rinse the wheels with a steady stream of water, be especially thorough near the lug nuts. If you see any remaining stains spot treat them with the same cleaner and a soft cloth or a wheel safe brush. Using a nylon brush or a brush with very stiff bristles can add swirls to the finish of the wheel, so look for brushes with very soft bristles or natural fibers. If you still have some remaining stains try a quality metal polish, which can generally be applied to most bare metals and clear coated wheels, see below (Polishing Wheels) for more information.
To effectively clean the inner barrels of your wheels, we highly recommend investing in an EZ Detail Brush. If you have protected your inner barrels with some protection (chances are you needed to do this with the wheels off of the vehicle) then you can dip the brush in soap and water and brake dust should come off very easily. If your wheels were not protected, spray some wheel cleaner on the inner parts of your wheels as well as your EZ Detail Brush to get a deeper clean. We recommend cleaning the inner barrels of your wheels first because when you pull the bristles back out, it can transfer some dirt and contamination on the face of your wheels.
Using a clay bar on your wheels is an effective way to properly prep the surface and remove stubborn brake dust. Be careful using one on high polished wheels as you could add micro-marring or swirls that can be difficult to remove.
Polishing your wheels can help increase the depth and gloss of your wheels as well as remove minor surface imperfections. If your wheels have a clear coat on them, then you can treat them the same as you would polishing your paint. If your wheels consist of bare metal, such as the lip of your wheel, you can polish them using a metal polish to increase gloss and depth and remove minor imperfections.
Note: Always test your polish on a small inconspicuous area before polishing your entire wheel.
When it comes to keeping your wheels looking like new for long periods of time you want to make sure your wheels are always protected. While you can use a sealant or wax to protect your wheels, there are some products that are designed specifically for your wheels. Poorboy's World Wheel Sealant is our favorite wheel protectant as it is easy to apply and remove, leaves behind a super slick surface so brake dust slides right off, is designed to withstand high temperatures that brakes produce, increases the depth and gloss of your wheels and makes cleaning your wheels a breeze.
Caring for your tires means more than just slapping on some tire dressing and calling it a day. A lot of detailing enthusiasts do not understand the importance of properly prepping your tires before applying a dressing. Properly prepping your tires can help increase the durability of your dressing and minimize tire dressing sling.
There are various types of tire dressing on the market: water based and silicone based. Water based tire dressings get absorbed into your rubber and can actually nourish your rubber keeping them soft and flexible. Silicone based tire dressings mainly sit on the surface of your tire, which often leads to tire dressing sling. Silicone based dressings can dry out your rubber and also brown it over time. Silicone based dressings are typically glossier than water based dressings.
We recommend dressing your tires after each wash (every 1 to 2 weeks). The condition of your tires will determine if they need to be cleaned and prepped. If you wash your tires and there is still dirt and contamination, we recommend using a degreaser on your tires to clean them and strip off any previous tire dressing. If you have high polished wheels, make sure the tire cleaner is safe for your wheel finish, in case you get product on them.
Cleaning your tires is pretty simple. We recommend using a dedicated wash mitt or sponge (foam media tends to work better since it's more durable) for your wheels and tires. Wash them with soap and water and assess if they need a deeper cleaning. If you are looking to get the most out of your dressing, we recommend cleaning your tires with a degreaser and a firm brush. Soak your tires with the degreaser and allow it to penetrate for a couple of minutes. Scrub your tires with the brush to remove the heavy contamination.
Applying the tire dressing is pretty straight forward. Simply dispense some tire dressing onto an applicator pad and work it into your tires. You want to use as little product as possible to prevent sling onto your paint. You are better off applying multiple thin coats of tire dressing than one thick coat. For complete even coverage, move your vehicle forward or backwards to apply dressing on the part of the tire that was closest to the ground.
Here are a few articles related to Wheel & Tire Care from our Ask-a-Pro Detailer Blog:
Ask-a-Pro Blog author James Melfi goes through the process of properly cleaning your wheels in the first video below. In the second video, James explains how to properly dress your tires.


Your exterior trim is constantly exposed to the elements, but it often doesn't receive the same care you provide your exterior paint. We encourage you to make sure you do not neglect this area as it is very important to the end result. When the trim is cleaned and protected it helps create a sharp contrast with your paint for a stunning appearance when you are done. Paying attention to these areas is what helps separate a good detail from an outstanding detail.
If you maintain your vehicle on a regular basis the trim should be relatively clean to begin with. Every one to three months we recommend using a light degreaser to ensure it's thoroughly cleaned. For protection we normally recommend re-applying the protectant every one to two months. The cleaner will help remove stubborn build ups and the protectant will provide a beautiful finish with UV protection. If you haven't cared for the trim in a while spend a little extra time cleaning the surface with at least one to two passes. If the trim looks severely neglected you may want to consider using one of our products designed to restore the trim.
Caring for the trim starts off with a cleaning and then you should assess the condition of the trim afterward. Most trim is vinyl, plastic or rubber so you can generally use the same type of cleaner on all three of these surfaces. Always clean the trim first while washing the vehicle with your shampoo and wash mitt. For a deeper cleaning spray a light degreasing solution on a microfiber towel and wipe the trim with medium pressure. When you are done the trim should look and feel much cleaner. If you still have stubborn build ups you can use a brush to work in the degreaser, but be careful you don't brush the surrounding paint.
If you have dried polish, sealant or wax on your trim (vinyl, plastic and rubber) try restoring it with the Poorboy's Trim Restorer. It's a deep cleaning formula that also dresses the trim with a dark and rich glow. Apply a few drops no larger than the size of a nickel to a microfiber towel or applicator and work it in to the surface with medium pressure back and forth. It will help remove the stubborn stains and leave a dark and shiny finish behind.
If your trim is clean but looks dull try using a product that will actually re-apply some of the lost color. The TUF SHINE Black Restore Kit or the Black WOW are both great options that will help restore the trim to like new. Each of them are powerful formulas that can help bring back that like new appearance that really lasts. They are both popular on vinyl, plastic and rubber surfaces.
For well maintained trim you will only need to use a protectant on it that you simply wipe on. A good protectant will provide strong UV protection and a fresh appearance to the trim. The 303 Aerospace Protectant offers superior UV protection and a nice dark finish that is not glossy or oily, so it's very popular amongst detailing enthusiasts. Spray a light coating on a clean applicator or towel and wipe the trim back and forth. A nice light coating provides the best results and within minutes it will be dry to the touch. The 303 Aerospace Protectant and most protectants can be applied to vinyl, rubber, plastic and more.
Here are a few articles related to Trim Care from our Ask-a-Pro Detailer Blog:

Caring for your glass is not only important for aesthetics but it's also critical for driving safely. If too much glass cleaner is left on the glass you can expect to see streaking and hazing which can be a detriment to your vision. This can be especially dangerous when driving in the evening so make sure you take the time to clean your glass properly. We understand that streaks are common and very frustrating but don't worry we'll show you the products and techniques needed for streak free glass cleanings.
You should care for your glass on an as needed basis to ensure you always have the best visibility when driving.
To get the most out of your glass cleaning both for the exterior and interior, the first thing you should do is roll your windows down a couple of inches so you can clean the very top of the glass effectively. Many detailers forget to do this step and if you drive with the windows partially down afterward you may see this area you missed. Follow the same technique that is outlined below for best results. We also recommend that you spray a light degreaser on a cloth and wipe the inside and outside edges of the window seal to ensure that it is clean.
When caring for interior glass you are usually dealing with different problems than your exterior glass. Interior glass can be subject to bodily oils from people touching windows, product over spray from treating your trim pieces, smoke residue and most commonly moisture from simply breathing inside the vehicle. While reaching certain parts of interior glass may be difficult, caring for the glass is pretty straight forward.
One of the most common mistakes we see in detailing is people using too much glass cleaner. Use just enough cleaner to remove contaminants and residue on the glass. The more product you use the more you need to buff off in the latter steps. We recommend using a total of 3 microfiber towels to care for your glass. One all purpose towel to apply the glass cleaner, a second all purpose towel to buff off visible residue and a third, low nap, glass specific microfiber towel to buff to a streak free finish. If you use just one towel you are almost guaranteed to see streaks afterward. We fold each one of these towels (16" x 16") in fourths and expose a fresh surface for each section of glass you are working on. This is especially important for the second and third towel so you can effectively remove the excess glass cleaner. Folding the towel in fourths gives you eight fresh surfaces and increases the value of any towel by utilizing the entire surface area instead of overusing just the middle section.
Another common mistake we see is working on the glass in direct sun. You must care for glass when it is cool and in the shade, otherwise you greatly increase the chances of leaving behind some streaking.
After you have put the vehicle in the shade the first step is to mist a small amount of glass cleaner on a microfiber towel folded in fourths. Avoid spraying your glass directly to prevent yourself from getting over spray on the trim pieces. It's actually best to spray the product onto the towel outside of the vehicle. Remember to use just enough glass cleaner to clean the glass, you can always mist your towel again if you need more product. Using the slightly misted towel apply some moderate pressure, slowly working the product into the glass while keeping the towel flat. Pass over each area multiple times to ensure you clean the glass from different angles. Take your second microfiber towel and buff off the excess product as best you can right after. Work in a logical pattern up and down and then side to side to ensure you don't accidentally miss any areas. Complete slow overlapping passes with moderate pressure while holding the towel flat. Finally, take your glass specific microfiber towel and repeat the same process to ensure no streaks have escaped.
The process listed above is pretty easy however reaching every corner of the glass can be challenging. We recommend using a Stoner Invisible Glass Reach and Clean Microfiber Mop Tool to effectively clean and reach the corners of your windshield effortlessly. Without a tool like this, it is difficult to apply pressure in to the lower corners of the front and rear windshield. Follow the same basic process listed above applying just enough cleaner to one microfiber bonnet and use the other glass microfiber bonnet to buff off the left over product. You can also simply wrap microfiber towels around the head of the mini-mop to get the same effect. Another tip when treating the front windshield is to sit on the passenger side of the car when cleaning the drivers side glass. This helps you get behind the steering wheel a little bit easier.
If you have tinted glass make sure you use a tint friendly cleaner that does not use ammonia or harsh chemicals. The Stoner Invisible Glass and the Chemical Guys Window Clean are two great choices that are completely safe on the tinted surfaces.
If you have fog forming on your front windshield make sure you turn off the recirculate mode from your heating and cooling system. The recirculate mode recycles the air currently in your cabin which contains more moisture. Moisture will often cling to the cooler glass forming a fog, which can reduce your visibility. Turning off the recirculate mode will help.
Your exterior glass is exposed to various elements as you drive and even when you are parked. Caring for your exterior glass is somewhat similar to caring for your paint, but remember glass is actually much harder. You want to thoroughly clean it and then protect it from the elements. To clean the glass you can wash, clay and even polish it so it is truly clean and clear. By protecting your exterior glass afterward with a sealant your maintenance will be much easier and you can improve your visibility during poor driving conditions.
If your glass needs just a basic cleaning, wash it as you would the rest of your vehicle. When you are done, follow the same cleaning steps as you would for your interior glass (see above), using multiple microfiber towels and just enough glass cleaner.
To give your exterior glass a deeper cleaning, you may want to consider using a clay bar. A clay bar can help remove contaminants trapped on top of the glass and in the micro-pores of the glass. The process here is virtually identical to the way you use a clay bar on the paint.
If you have very faint water marks on your glass distilled white vinegar is a good home remedy. Unfortunately some water mark etchings are too deep for the vinegar solution to remove, so in these situations we highly recommend using the Glass Science Glass Scrub. This is a unique cream glass polish designed to dissolve mineral deposits and remove light etchings, sap, road grime and more. Even if you think your glass is clean the Glass Scrub will make it look noticeably cleaner and moisture will roll off easier instead of clinging to contaminants. The Glass Scrub needs to be applied to a wet surface, so the best time to use this product is just after washing and before drying. With the glass wet apply a dime sized drop to a wet foam applicator and buff it in with medium pressure in a circular motion. Use more product as need be but try not to use an excessive amount because the Glass Scrub needs to be thoroughly rinsed off when you are done.
After your glass is clean and clear you can protect it with a sealant. This will help moisture (i.e. rain, sleet and snow) form small beads that roll right off with ease. It will also help prolong the life of your wipers since you won't have to use them as often and there is less friction. You can use a glass specific protectant such as the Glass Science Rain Clear or a sealant used on the paint. The Rain Clear is a gel based formula that needs to be applied thin and buffed off with medium pressure and a clean microfiber towel. A traditional sealant like those used on the paint can also be used to protect the exterior glass. Both options will help repel the moisture and make driving much simpler no matter the weather.
Here are a few articles related to Glass Care from our Ask-a-Pro Detailer Blog: